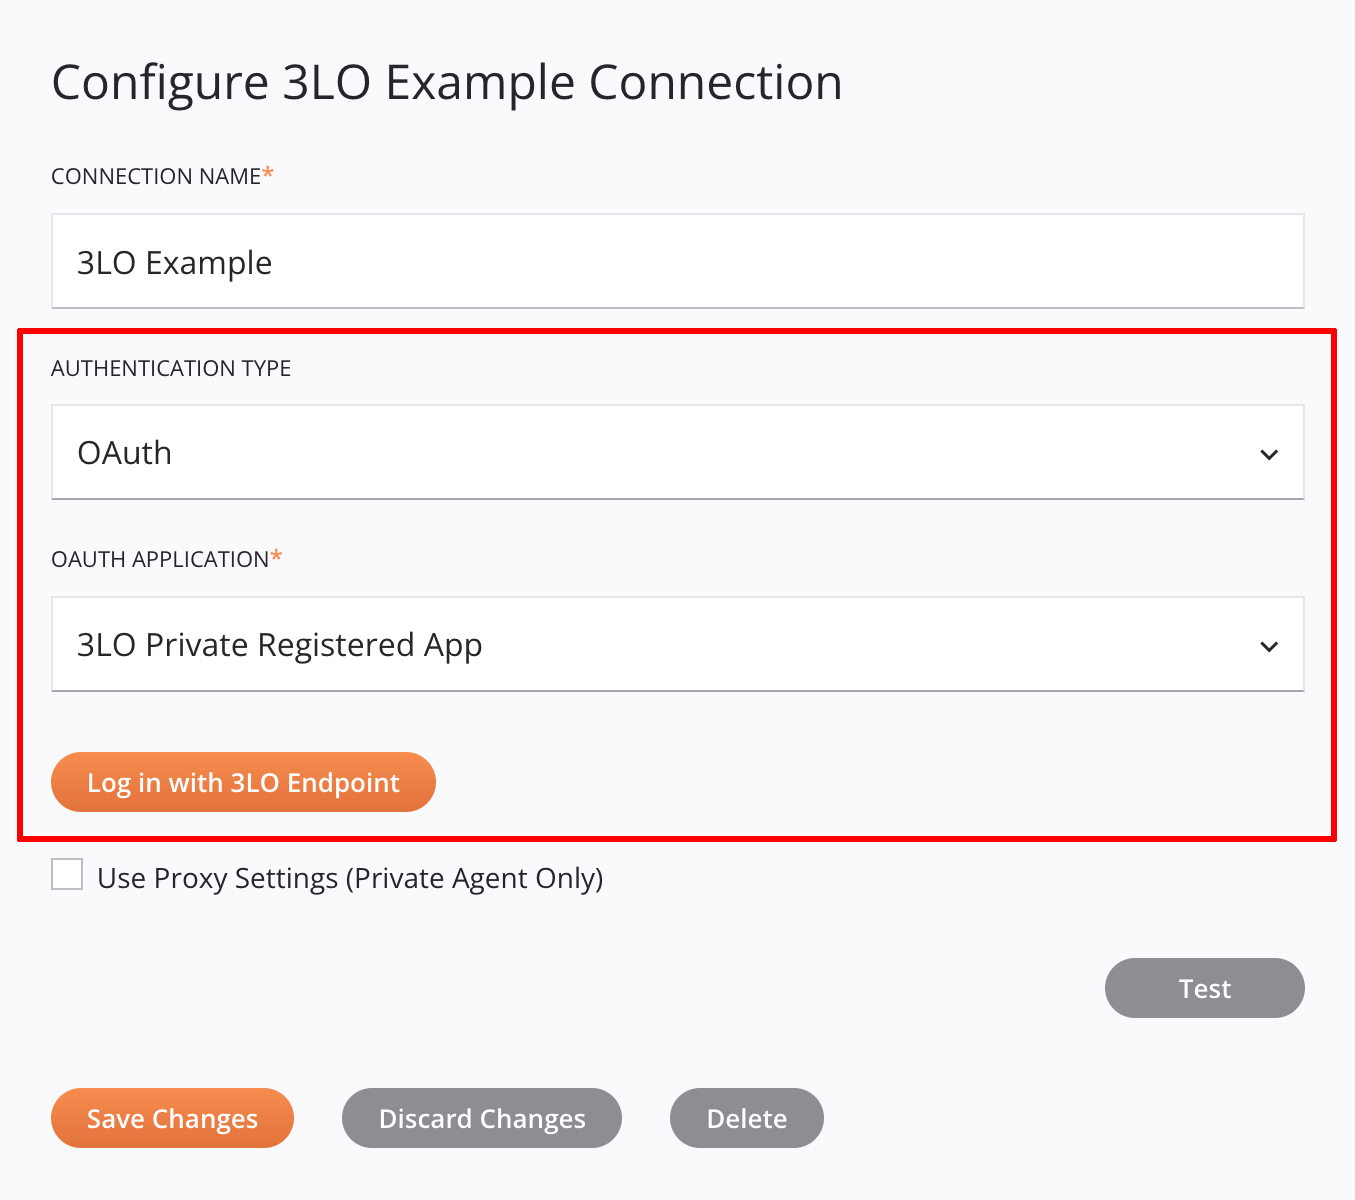
3-legged OAuth 2.0 component
Overview
The 3-legged OAuth 2.0 (3LO) component is required to support 3LO in a connector. It enables the use of 3LO authentication with applications (cloud and private) registered in Harmony. For more information on 3LO, see Connector 3-legged OAuth 2.0.
The 3LO component is designed for connector endpoint configuration and it must be added to the endpoint in the adapter.json only. When implemented, this is how the 3LO component appears when the associated elements are visible:

Important
If using a private agent, 3LO-enabled connectors require agent version 10.83 / 11.21 or later.
Component features
The 3LO component includes definitions for authentication types and a login button:
-
Authentication Type dropdown: Users select from a list of developer-defined authentication types. At minimum, an
enumValuesdefinition with1as itsrealValueis required.1will always represent 3LO authentication.
-
OAuth Application dropdown: Users select from a list of associated Cloud Applications and Private Applications generated by Integration Studio. This UI element will be displayed in Integration Studio when there is a private application associated with the 3LO-enabled connector. This is the dropdown when visible and expanded:

Important
Private applications can be freely defined and modified in the Management Console App Registrations page. Jitterbit partners may be able to configure cloud applications by working with Jitterbit directly.
-
Login button: Users click to authenticate with a third-party OAuth provider.

Component JSON
The 3LO component is implemented by adding two properties to the endpoint in the adapter.json. Both are required for 3LO to work as expected with a connector.
{
    "name": "3lo_auth_type", // Required
    "displayName": "{{To Be Replaced}}", // Authentication Type dropdown name
    "enumValues": [
        {
            "enumValue": "3LO",
            "realValue": "1" // Required
        }
    ]
}
{
    "name": "oauth_login", // Required
    "displayName": "Log in with {{To Be Replaced}}", // Login button name
    "widgetHint": "component:oauth-login", // Required
}
Tip
If 3LO is the only authentication type planned for the connector, you can hide the dropdown in the UI using hidden as long as defaultValue is 1:
{
    "name": "3lo_auth_type",
    "hidden": true,
    "displayName": "Authentication Type",
    "enumValues": [
        {
            "enumValue": "3LO",
            "realValue": "1"
        }
    ],
    "defaultValue": "1"
}
To define additional authentication types beyond 3LO, provide them as additional enumValues definitions starting with 2 for realValue:
{
    "name": "3lo_auth_type",
    "displayName": "Authentication Type",
    "enumValues": [
        {
            "enumValue": "Token-based Auth",
            "realValue": "2"
        },
        {
            "enumValue": "3LO",
            "realValue": "1"
        }
    ],
    "defaultValue": "2"
}
Important
For a 3LO-enabled connector to work as expected, an application (cloud or private) must be associated with the 3LO-enabled connector.
Private applications can be freely defined and modified in the Management Console App Registrations page. Jitterbit partners may be able to configure cloud applications by working with Jitterbit directly.
Component values
During connector configuration and at runtime, the agent will automatically inject access_token as part of the props (properties) parameters to Connector SDK methods.
For example, in the ConnectionFactory, the access_token property will be part of props in the createConnection method:
@Override
public Connection createConnection(Map<String, String> props) {
  // The props parameter contains "access_token" as a key-value pair.
}
Exception handling
3LO-enabled connectors must throw an ConnectionException exception if the HTTP call using access_token returns an Unauthorized Status Code (HttpStatusCode 401).
The exception will cause the agent to refresh the access_token value and execute a retry process between the agent and the connector. For example:
Important
Connectors should not manually handle the access_token refresh process because it is already handled by the agent.
public void exampleMethod() throws Connection.ConnectionException {
  try {
    // Method implementation...
  } catch (Exception ex) {
    throw new Connection.ConnectionException(Param1, Param2, Param3);
  }
}
App registration configuration
After the 3LO-enabled connector is deployed, it will become a Connector dropdown option in the Management Console App Registrations.
Prerequisites
Before configuring an application with the 3LO-enabled connector, complete these prerequisites:
- If using a Private Agent, install the 3LO-enabled connector on the agent.
- Create the OAuth application on the relevant third-party OAuth provider. This will provide the information necessary for next steps, such as the Client ID and Client Secret values. For example, if you were developing a Jira connector, you would need to create an associated OAuth app in the Atlassian Portal first.
Configuration
Refer to our documentation on the Management Console App Registrations page to provide the relevant information there for a new private application, including any relevant Advanced Options based on the requirements or settings of the chosen third-party provider.