Connector tutorial scenario 5: Get file
Introduction
This scenario demonstrates the use of a Dropbox Get File activity.
In this scenario, a file is fetched from Dropbox and then written to an FTP server.
Note
Similar to Scenario 4: Process file, the file is dynamically specified during the configuration of the activity in Integration Studio by reading the directory contents of the Dropbox folder.
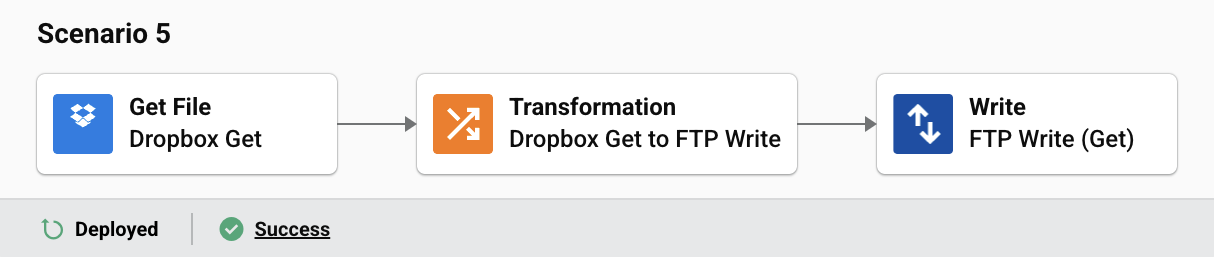
Here is the completed operation:
Important
To complete this operation and scenario, complete the prerequisite setup required in the Dropbox connector tutorial.
You should have the following:
- Access to a Dropbox account and FTP server.
- Configured Dropbox and FTP connectors.
- Access to
assets/sample-data directoryof the Dropbox connector repository.
1. Copy sample file to Dropbox
Copy the sample file (account.json) from the assets/sample-data directory of the Dropbox connector to the root directory of your Dropbox account.
2. Add a Dropbox Get File activity to an operation
Drag a Dropbox Get File activity from the design component palette to the component drop zone on the design canvas to create an instance of a Dropbox Get File activity in a new operation. Double-click the activity to open it.
Enter a name and a folder path (such as /).

Click Next to go to the next step.
With the Dropbox Get File activity, we are demonstrating the ability of a connector to dynamically configure the schema based on a user selection.
The schemas available are included in the connector at build time, but a connector could dynamically refresh the list and available connectors.
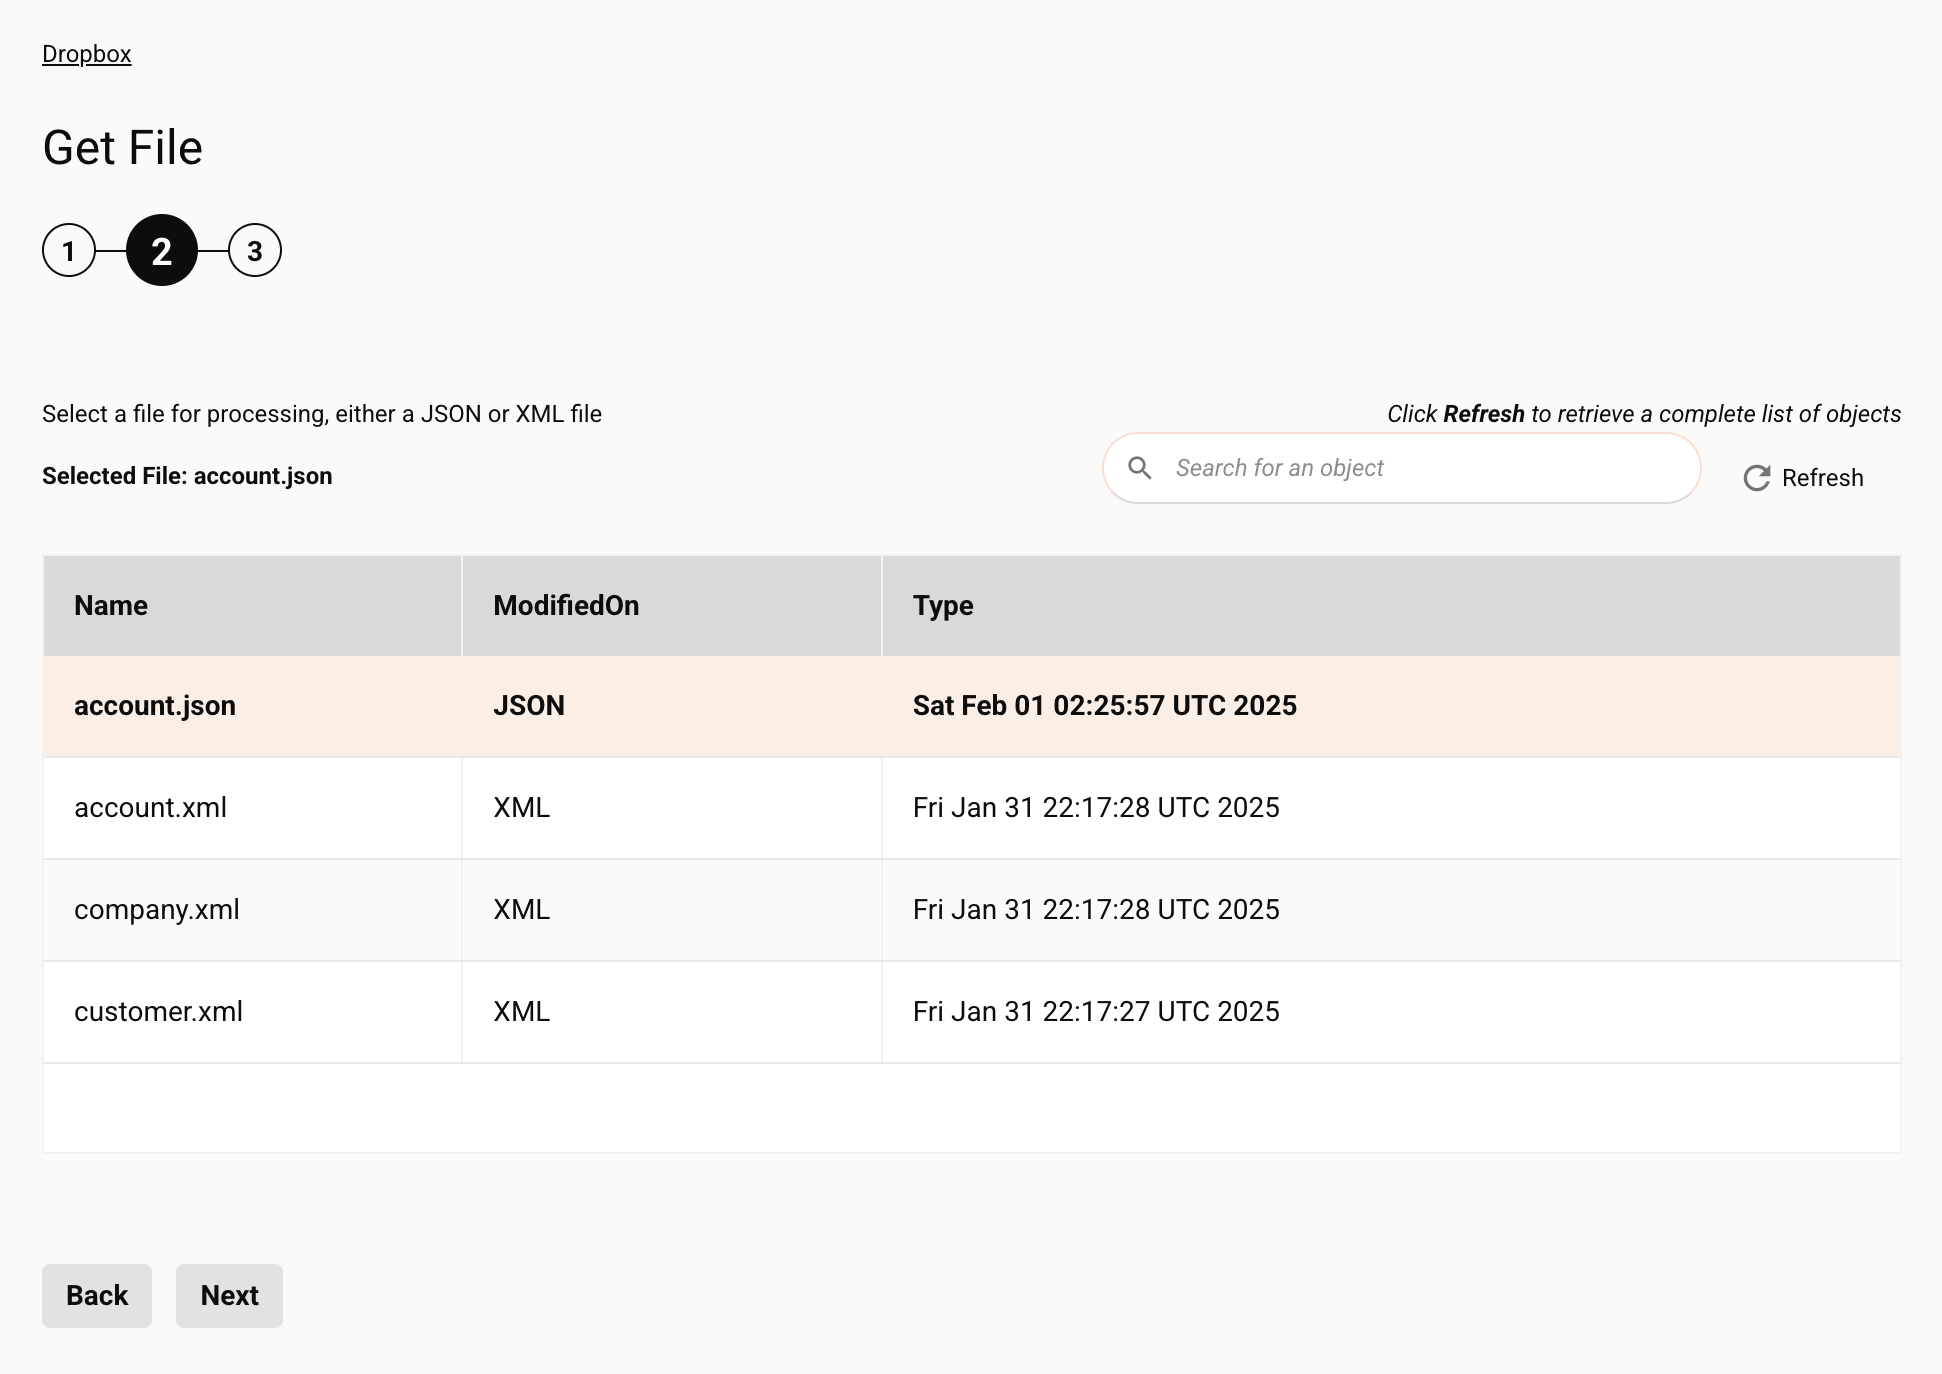
Select the account.json row, as that will use the XSD associated with the account JSON file:
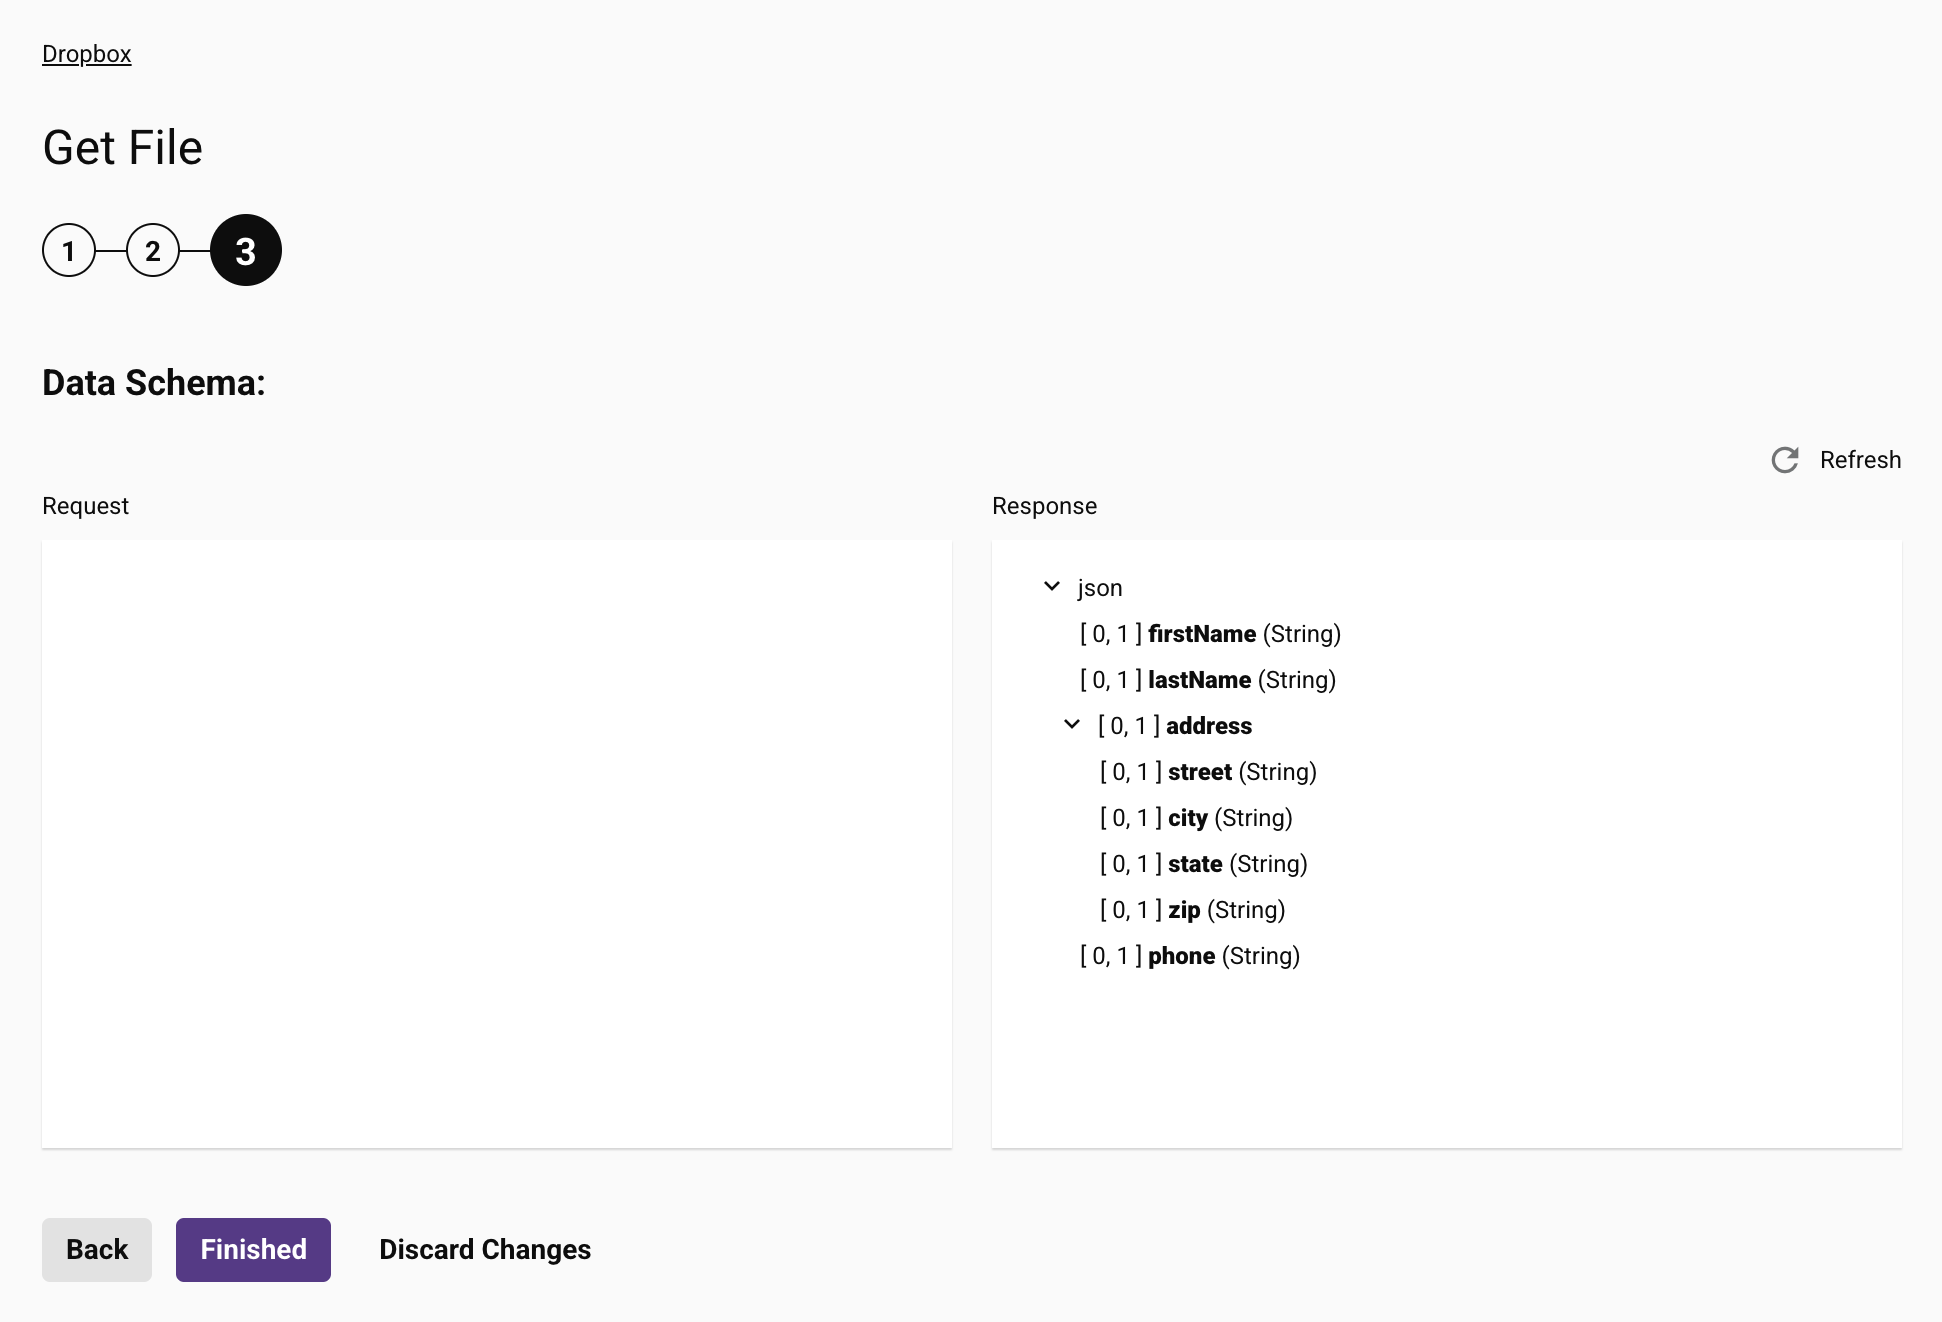
Click Next to review the data schema, showing that the response from Dropbox will be a JSON object and showing its fields.
At this point, you can go back to the previous screen and try selecting the other file types to see how the data schema changes to reflect the chosen file.
When finished, make a note of which file you have selected; we'll show the tutorial using the account.json file:
Click Finished to close the activity configuration.
3. Add an FTP Write activity to the operation
Drag a FTP Write activity from the design component palette to the component drop zone on the design canvas to create an instance of a FTP Write activity in a new operation. Double-click the activity to open it.
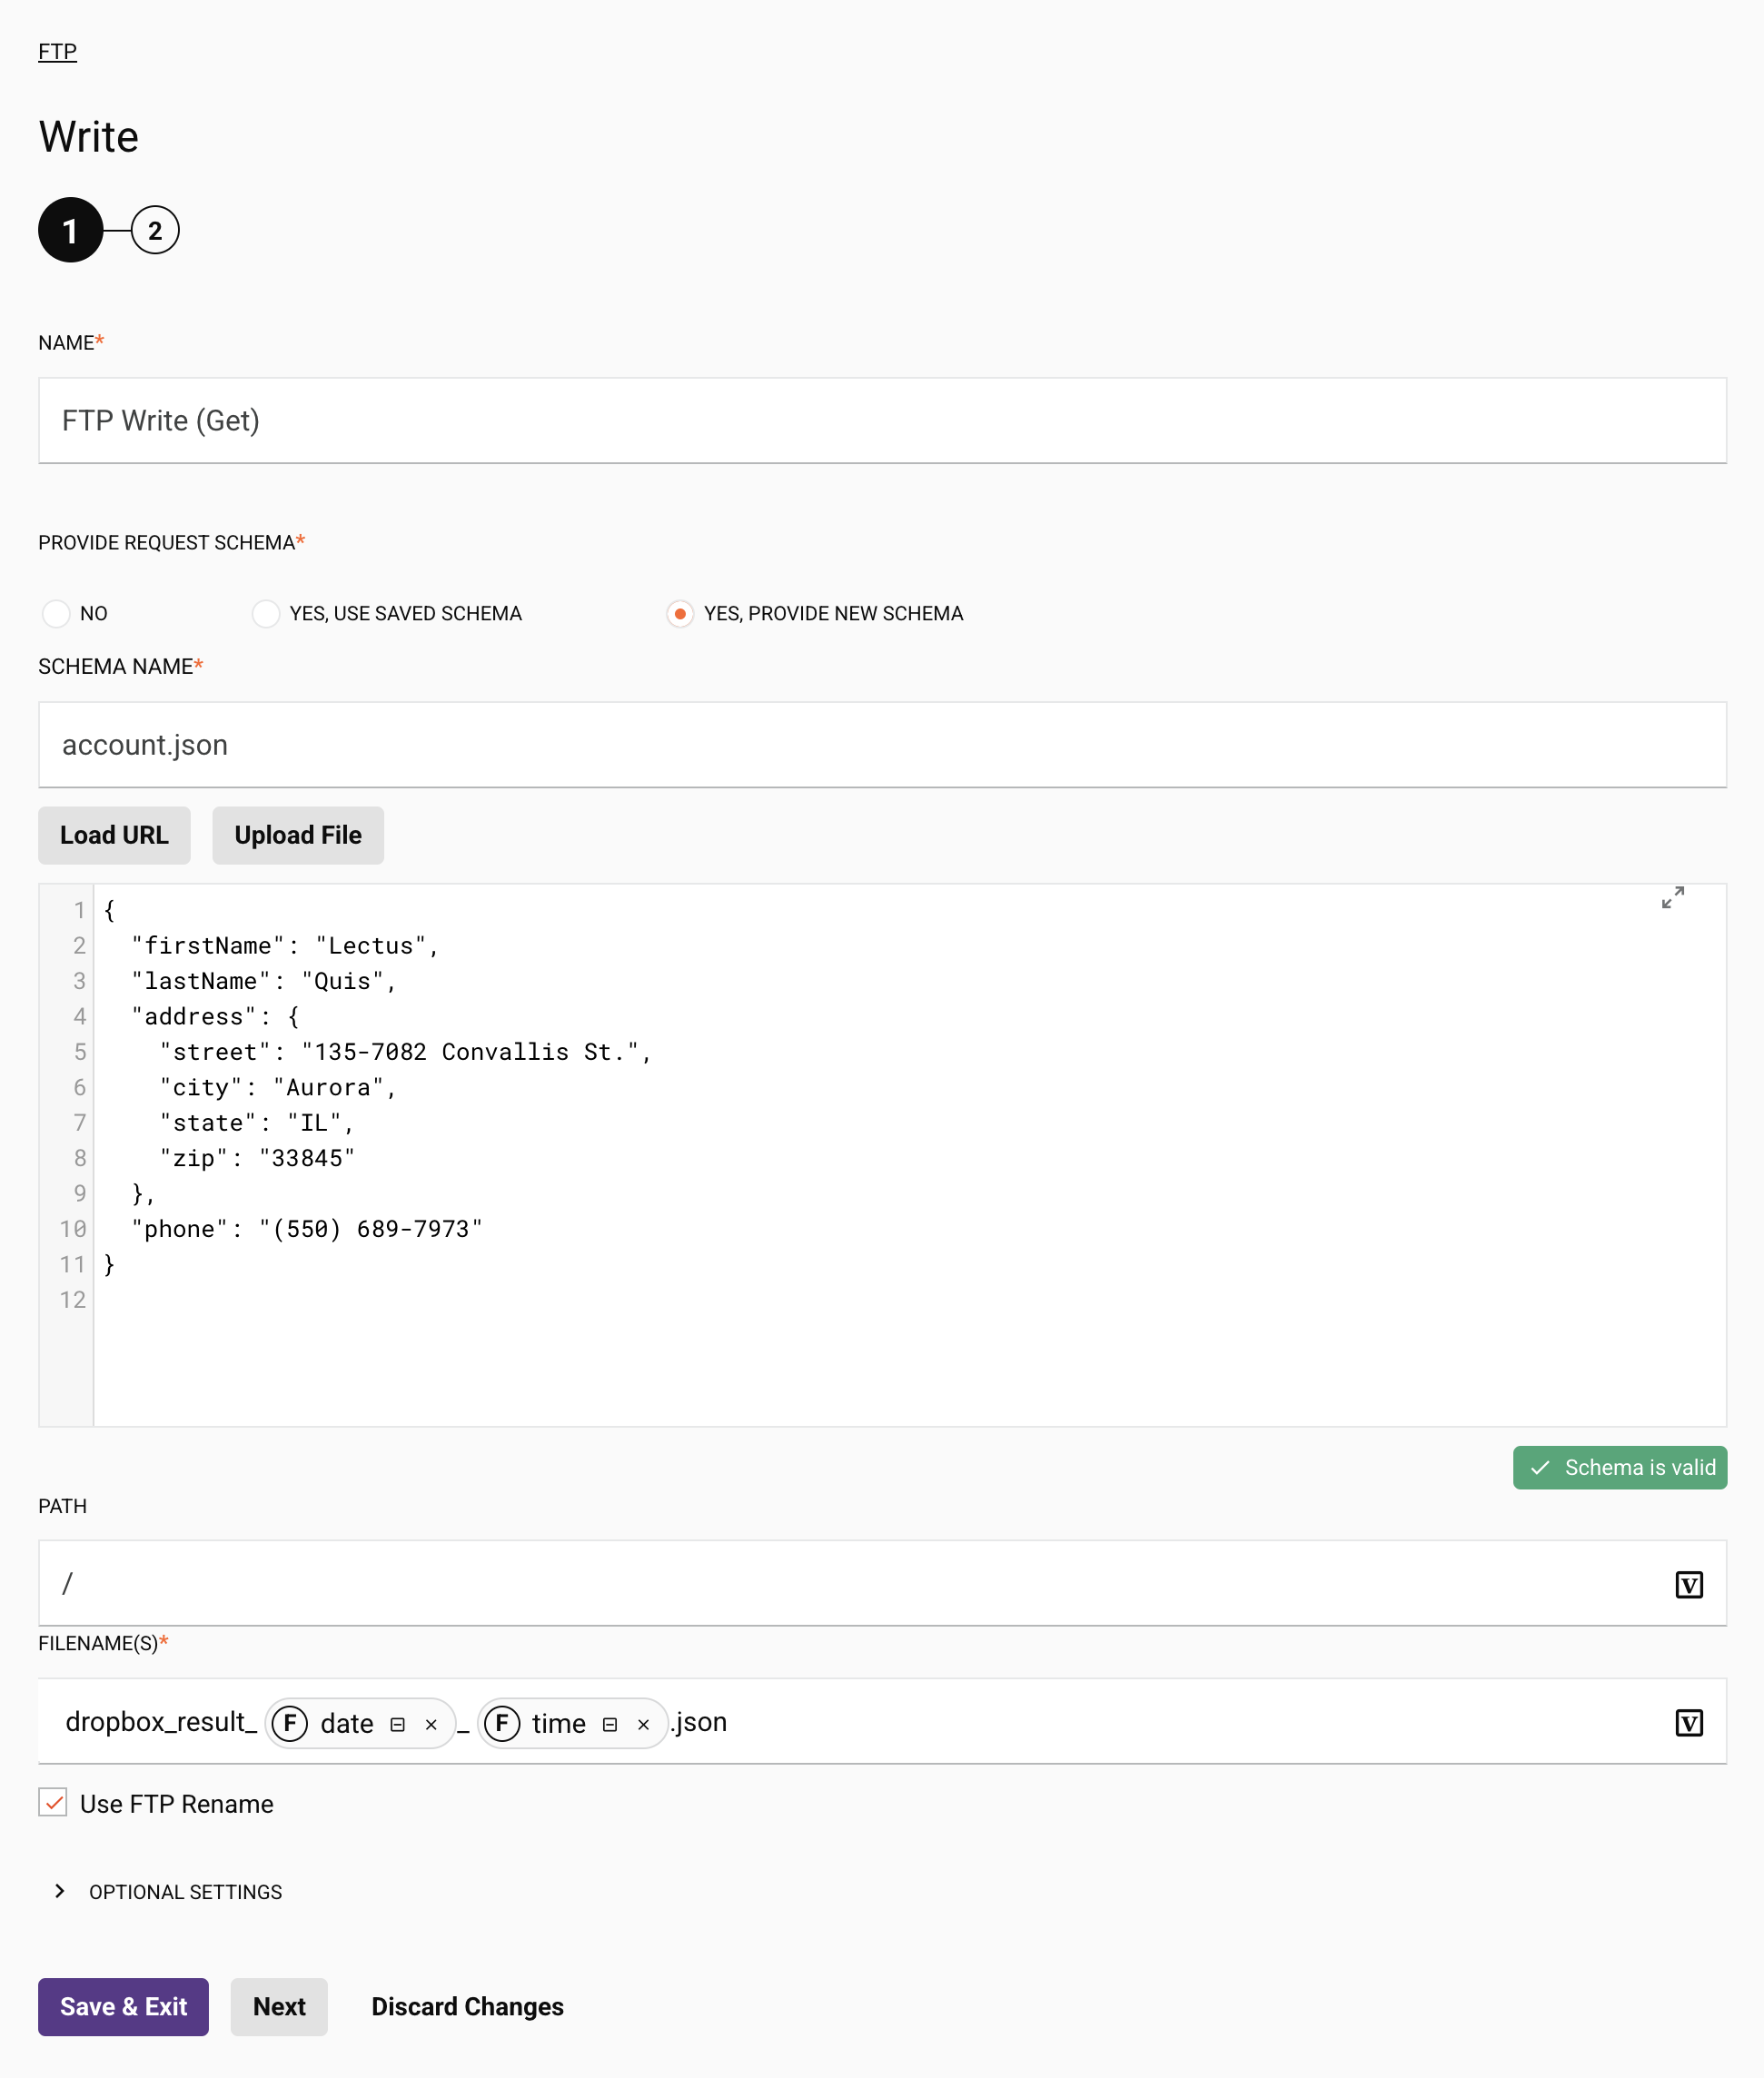
Configure it with a name, a path (such as /), and an appropriate file name pattern (such as dropbox_process_results_[date]_[time].json).
The FTP Write activity will look like this:
Click Next and then Finished to return to the workflow.
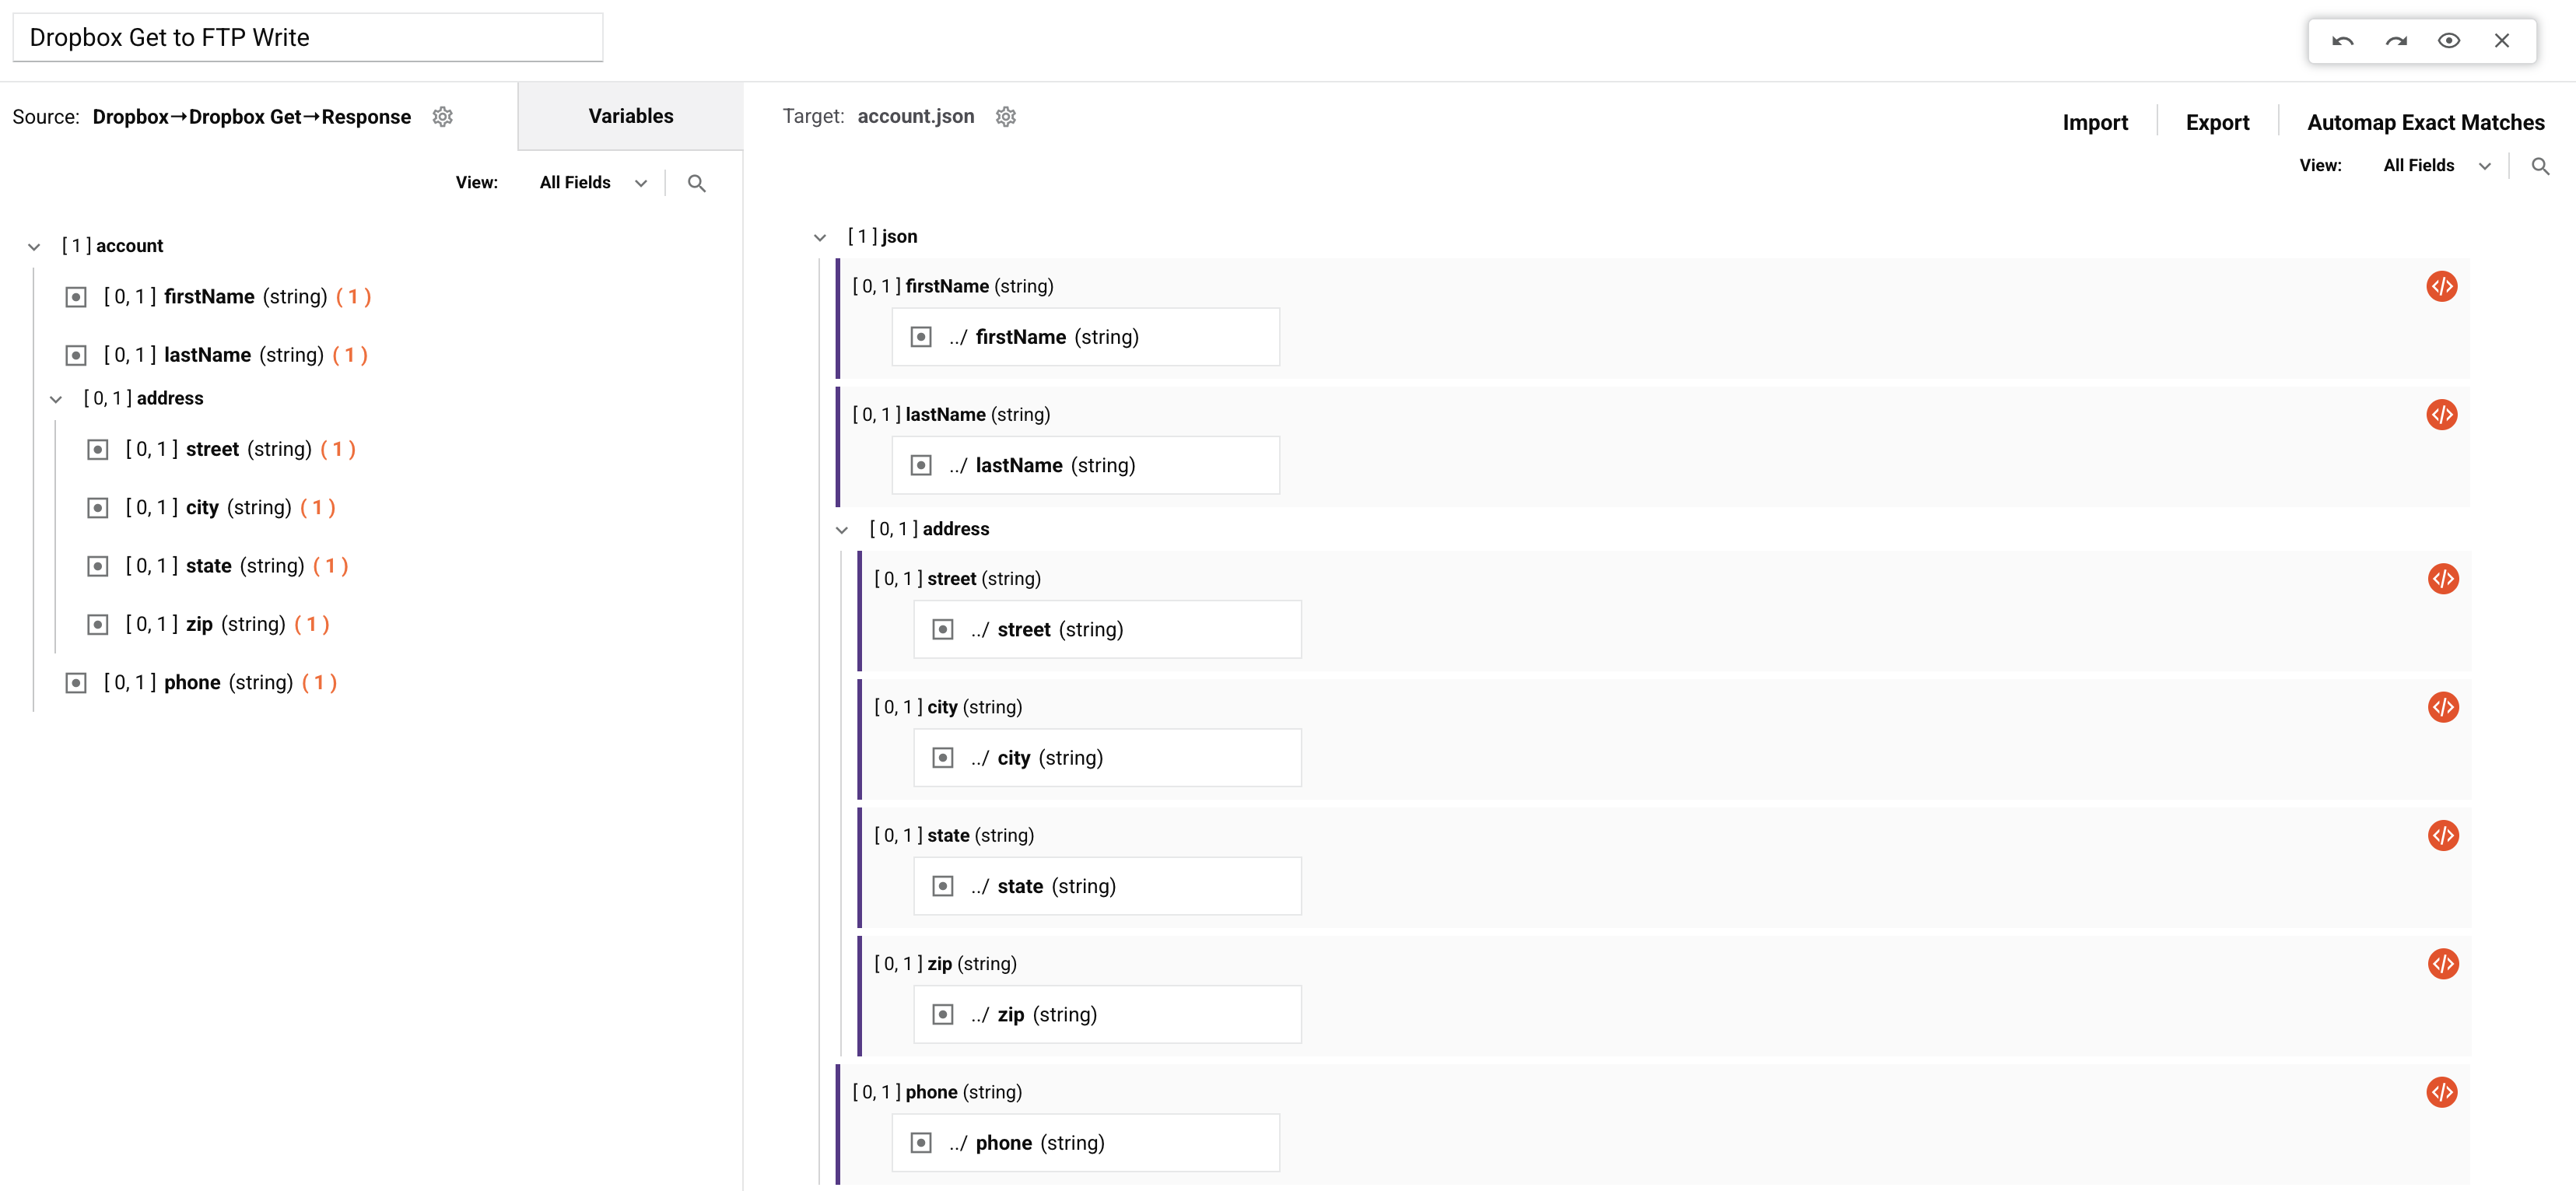
4. Add a transformation to the operation
Add a transformation between the two activities.
When it opens, give the transformation a name and then Automap Exact Matches to create the transformation mapping.
Click the Close icon to save the transformation configuration and return to the workflow:
5. Run the operation
Deploy and run the operation. The selected file should be retrieved from Dropbox and written to the FTP server with a name based on the pattern.
In the operation log, you should see a log message that the operation was successfully completed:

Variations
You can now revise the operation and try other sample files (JSON or XML) and see that they are processed in a similar fashion.