Connector tutorial scenario 1: Fetch file
Fetch a text file from Dropbox and write it to an FTP server
This scenario demonstrates the use of a Dropbox Fetch File activity. In this example, a text file is fetched from Dropbox and then written to an FTP server. The resulting file will be a JSON file that includes both the content of the file and the metadata about the file received from Dropbox. (For an example where only the content of the file is returned, without the metadata, see Scenario 2: Fetch file.)
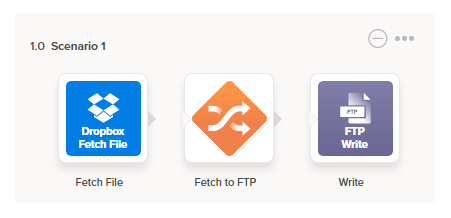
Here is the completed operation:
To complete this operation and scenario, you’ll need a text file in the folder of your Dropbox application. A sample file customers.csv is provided in the assets/sample-data directory of the Dropbox connector source files for this purpose.
Here is an example of the output file that will be created, which is a JSON file with both metadata and the file contents in a single structure:
{
  "name": "customers.csv",
  "clientModified": "2018-03-16T14:40:39-07:00",
  "serverModified": "2018-04-10T14:10:52-07:00",
  "rev": "49a708770",
  "size": 2231,
  "sharingInfo": {
    "readOnly": null,
    "parentSharedFolderId": null,
    "modifiedBy": null
  },
  "content": "Y29tcGFueSxhZGRy...I2NzcsKDc4MikgMzQzLTAyNjA=",
  "link": null
}
1. Copy sample file to Dropbox
Copy the sample file (customers.csv) from the assets/sample-data directory of the Dropbox connector to your Dropbox account.
2. Add a Dropbox Fetch File activity to an operation
Drag a Dropbox Fetch File activity type from the design component palette to the component drop zone on the design canvas to create an instance of a Dropbox Fetch File activity in a new operation. Double-click the activity to open it.
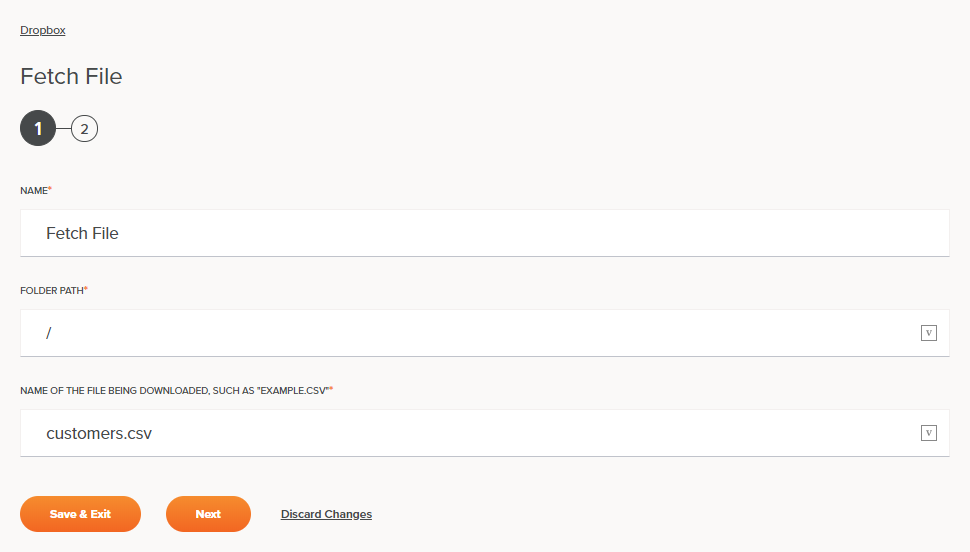
Enter into the configuration a name (such as “Fetch File”), a folder path (you can use the default of /), and the name of the file to be downloaded (such as customer.csv):
Clicking the Next button will take you to a screen where you can review the data schema:
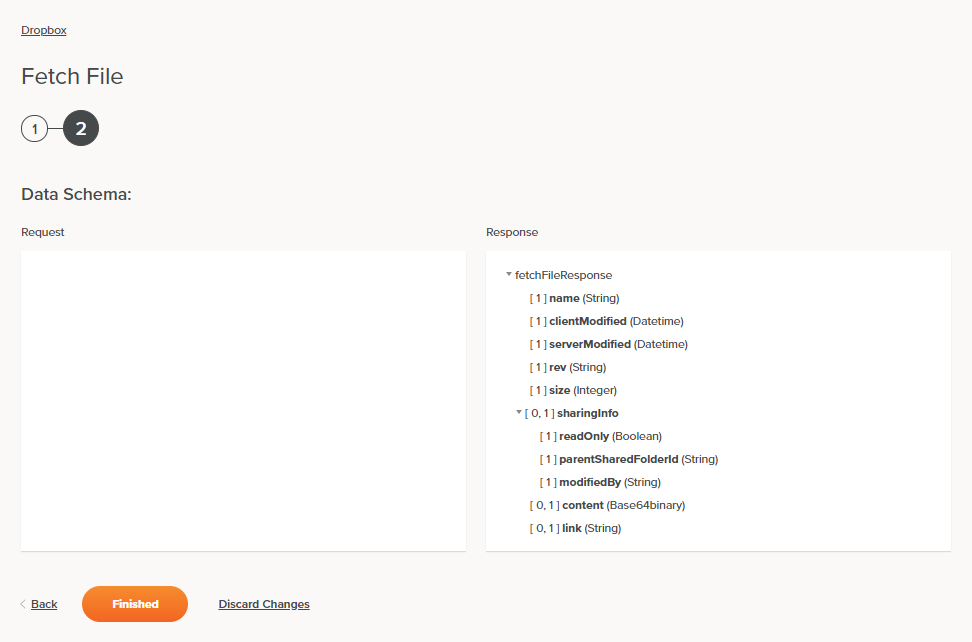
This shows what is returned (the response) from Dropbox. It will be in an XML format, and shows that the metadata about the file is returned in addition to the content field, which contains the actual content.
Click Finished to return to the workflow.
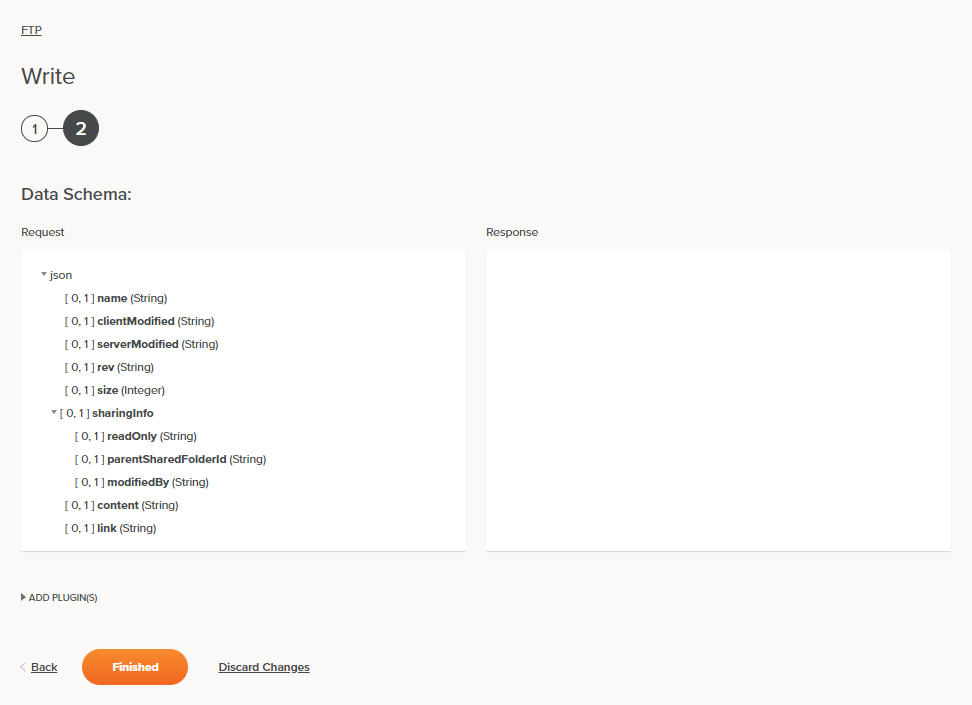
3. Add an FTP Write activity to the operation
Using the FTP endpoint called “FTP” you configured for this tutorial (see Tutorial scenarios in Dropbox connector tutorial), drag an FTP Write activity type to a component drop zone in the operation just after the “Dropbox Fetch File” activity.
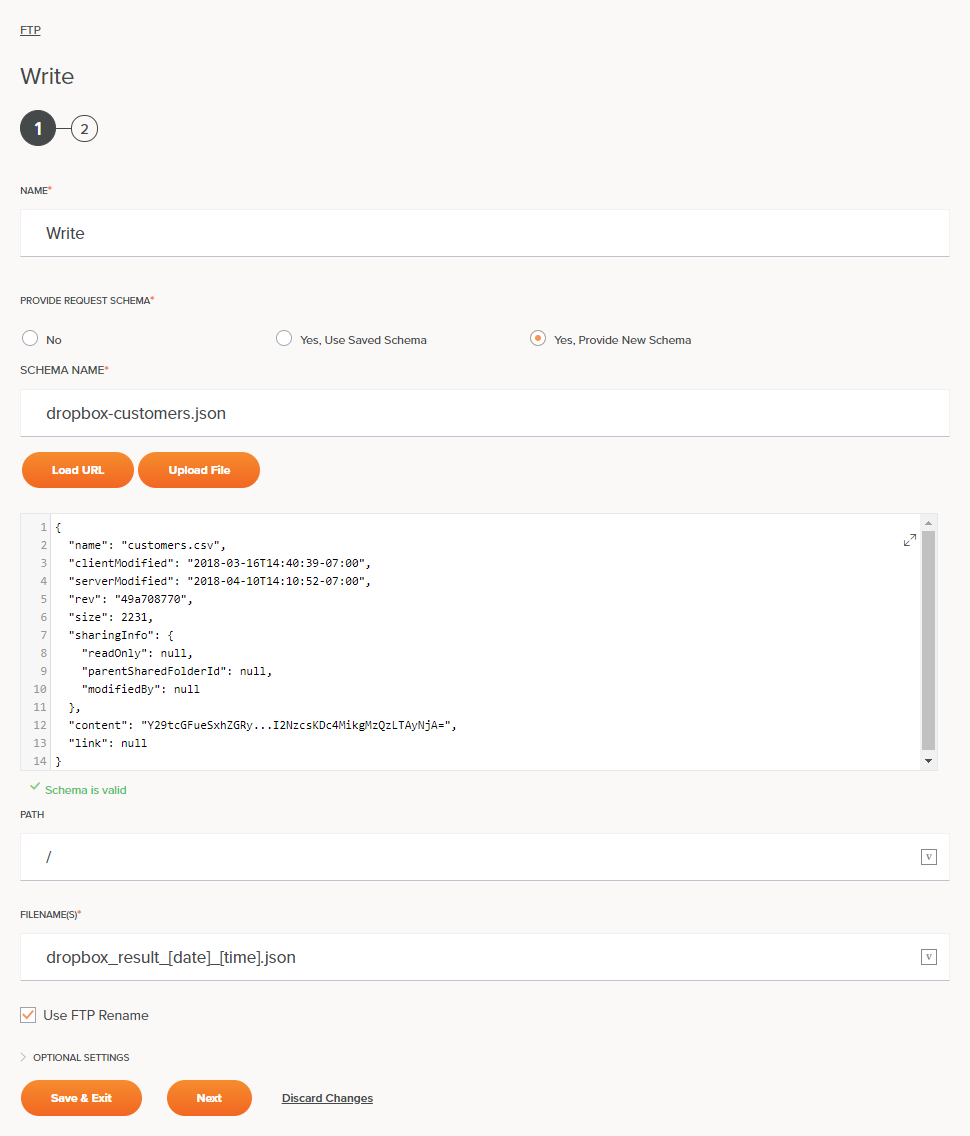
Configure it with a name (such as “Write”), provide a JSON schema (you can copy and paste the example JSON file shown above and set the schema filename to customers.json as shown), and a filename (such as dropbox_result_[date]_[time].json). This filename will create a new timestamped filename every time the operation is run.
The “FTP Write” activity will look like this:
Click Next and then Finished to close the “FTP Write” configuration.
4. Add a transformation to the operation
Hover over the area between the two activities in the operation and click the component drop zone to open a menu where you can select New Transformation.
Configure the transformation with a name (such as “Fetch to FTP”). If you have created the schema in the FTP Write activity as described above, you can use the Automap Exact Matches link to automatically map all fields of the “Dropbox Fetch File” response to the “FTP Write” target. Click Return to Workflow to save the transformation configuration and return to the workflow.
![]()
5. Name the operation
If you haven’t already, give your operation (and workflow) appropriate names.
6. Run the operation
Assuming that you have placed a customers.csv file in the folder of your Dropbox application, you can now deploy and run the project (or just the operation).
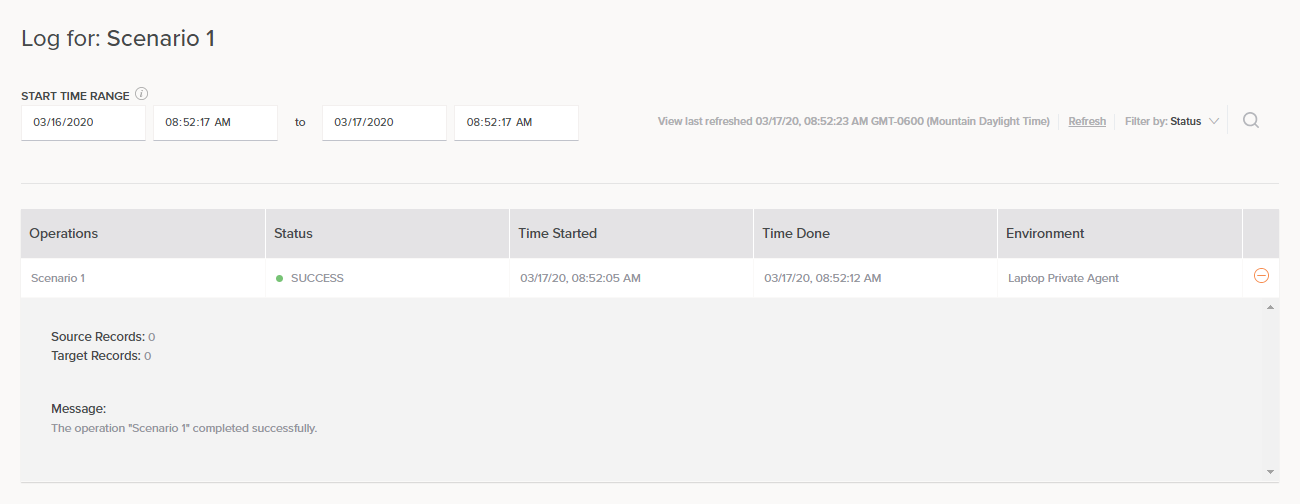
In the operation log, you should see the operation being received and then successfully completed:
7. Confirm success
To confirm success, open your FTP server and check that the file has been added. (If you are using the Jitterbit training FTP server, a web viewer for it is located at https://training2.jitterbit.com/WebInterface/login.html.)
The new file should be in the root directory with a name similar to dropbox_result_[date]_[time].json. If you download and view the file, you will see that it looks similar to this:
{
  "name": "customers.csv",
  "clientModified": "2018-03-16T14:40:39-07:00",
  "serverModified": "2018-04-10T14:10:52-07:00",
  "rev": "49a708770",
  "size": 2231,
  "sharingInfo": {
    "readOnly": null,
    "parentSharedFolderId": null,
    "modifiedBy": null
  },
  "content": "Y29tcGFueSxhZGRy...I2NzcsKDc4MikgMzQzLTAyNjA=",
  "link": null
}
The file is a JSON file, with the metadata from Dropbox being the first fields. The content field shows as a base64-encoded string.
In Scenario 2: Fetch File (the next scenario) we’ll see how to work with the response from Dropbox to access the unencoded form of this content.